In our Previous Guide, we see about Ghost-CLI Installation Method on Ubuntu Localhost.
Now in this Post, we are going to learn about the Method to Install Ghost-CLI on DigitalOcean.
I am really excited about this New feature from Ghost CMS.
It having Some amazing Features
- Free SSL (Built-in Let's Encrypt SSL with Auto-renewal Feature)
- Auto SSL Optimization with A+ Grade
- HTTP/2 Support
- Single line Command Update your Ghost blog and Ghost-CLI
- MYSQL Server
- Automatically Set up the Systemd & Ghost service
- Multi-sites
Steps
- Server Requirements
- Recommended Hosting Providers for Ghost CMS
- Server Setup
- Install Ghost-CLI on DigitalOcean
- Install Ghost CMS via Ghost-CLI
- SSL Setup
- Fix Ghost SSL Errors
- Ghost-CLI Commands
- Google Cloud Configuration for Ghost
Requirements
- OS - Ubuntu 16.04 64 bit
- Ram Minimum 1GB (DO - Choose 10$ Droplet / Linode - 5$ / Vultr - 5$)
- Node.js Stable Version
- MySQL
- Nginx
- Ghost-CLI
- SSH Terminal to Manage the server (For Windows use Putty)
Recommended Hosting Providers for Ghost CMS
| Hosting | Plan | Price | Purchase |
|---|---|---|---|
| DigitalOcean | Droplet 1 (1GB RAM) | 5$ | Buy Now |
| Linode | Linode 1GB Plan | 5$ | Buy Now |
| Vultr | 25GB SSD Plan (1GB) | 5$ | Buy Now |
Here's the Complete Guide to Install Ghost-CLI on DigitalOcean and Steps Install Ghost CMS Via Ghost-CLI with Free SSL & HTTP/2 Support - Manage Everything From Single Line Commands.
Server and Host Setup
- Update the Packages
sudo apt update && apt upgrade -y
- Create New User
- Replace username with your New SU Username
adduser username
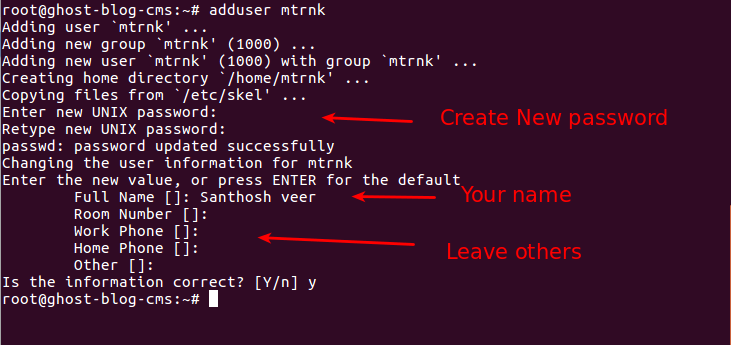
- add the newly Created user to 'Superuser' (Yes SUDO Format)
usermod -aG sudo username
- While Installing Packages and Ghost CMS Don't run as root
- Now login as Sudo user (that you created at second step)
su - username
- Install Nginx Server
sudo apt-get install nginx
- After installing the Nginx install MYSQL server
sudo apt-get install mysql-server
- Secure the MYSQL server - Remove the anonymous user and test database
mysql_secure_installation
- SQL Server Setup - After running the above command it asks some questions
- Follow the Below Answers to complete the Secure Installation Setup
Enter password for user root: <Your MYSQL Login Password>

VALIDATE PASSWORD PLUGIN can be used to test passwords
and improve security. It checks the strength of password
and allows the users to set only those passwords which are
secure enough. Would you like to setup VALIDATE PASSWORD plugin?

Press y|Y for Yes, any other key for No: No
Using existing password for root.
Change the password for root ? ((Press y|Y for Yes, any other key for No) : No

 ... skipping.
By default, a MySQL installation has an anonymous user,
allowing anyone to log into MySQL without having to have
a user account created for them. This is intended only for
testing, and to make the installation go a bit smoother.
You should remove them before moving into a production
environment.

Remove anonymous users? (Press y|Y for Yes, any other key for No) : y
Success.


Normally, root should only be allowed to connect from
'localhost'. This ensures that someone cannot guess at
the root password from the network.

Disallow root login remotely? (Press y|Y for Yes, any other key for No) : y
Success.

By default, MySQL comes with a database named 'test' that
anyone can access. This is also intended only for testing,
and should be removed before moving into a production
environment.


Remove test database and access to it? (Press y|Y for Yes, any other key for No) : y
 - Dropping test database...
Success.

 - Removing privileges on test database...
Success.

Reloading the privilege tables will ensure that all changes
made so far will take effect immediately.

Reload privilege tables now? (Press y|Y for Yes, any other key for No) : y
Success.

All done!
- Install Node.js Server
- Before installing the Node.js install Python Software Properties
sudo apt-get install python-software-properties
- Download the Latest Node.js Setup Package
curl -sL https://deb.nodesource.com/setup_6.x | sudo -E bash -
- Install Node.js and NPM
sudo apt-get install nodejs
Install Ghost-CLI on DigitalOcean
- Install Ghost-CLI
sudo npm i -g ghost-cli
Install Ghost CMS Via Ghost-CLI
- Create New Folder on www for installing the Ghost CMS (Example: I am created a new Folder on WWW Named as ghost)
sudo mkdir -p /var/www/ghost
- Set Ownership Permission for newly Created Folder (username - Replace it with your Newly Created su username)
sudo chown username:username /var/www/ghost
- Open the Folder that you Created for Install Ghost CMS
cd /var/www/ghost
- Installing Ghost CMS via Ghost-CLI
ghost install

- While installing the Ghost Blog CMS It ask to fill your Website URL and MYSQL Database Login Credits fill it and Continue your Installation
Official Docs for Set up
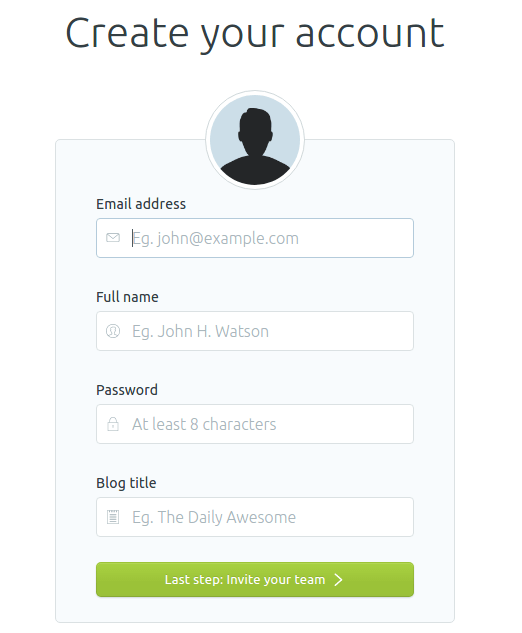
- After Completing your installation set up Admin Account for your Ghost blog
http://example.com/ghost
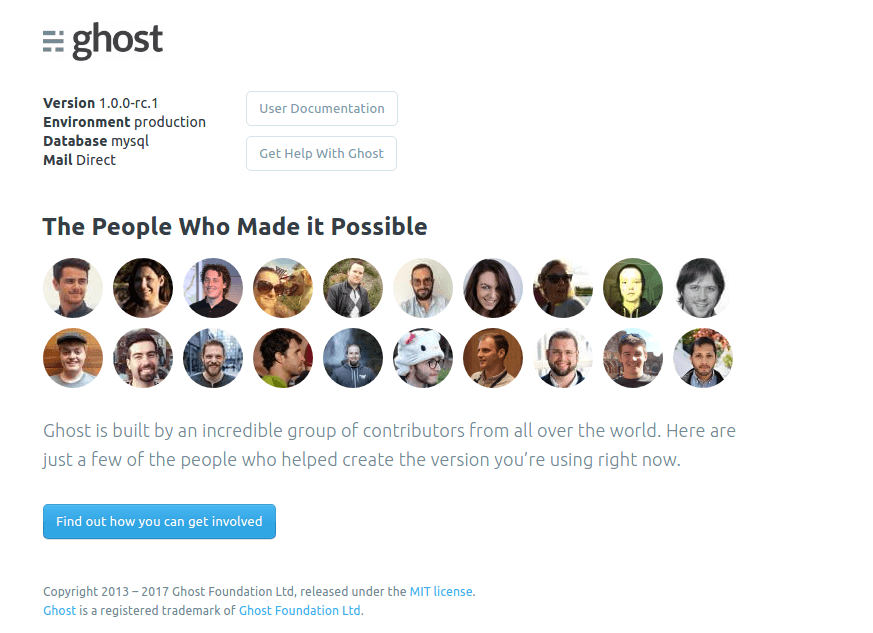
- Verify your Install by Runnig this Below command line on Ghost Installed Folder
ghost doctor
SSL Configuration
- if you enter the HTTP version while setup Ghost CMS you can easily update your URL into HTTPS version
- Open Ghost blog config.production.json File
sudo nano /var/www/ghost/config.production.json
- Replace HTTP Version URL with HTTPS URL

- After changing the URL save it & Restart the Ghost
ghost restart
Facing SSL Errors?
Ghost-CLI Configure SSL for NON-WWW or WWW yes if you give non-www URL while installation it will Generate SSL for non-www version only.
How to Fix this?
You Need to update your Ghost blog URL & Create SSL for WWW.
Recently I am facing this issue so I create a Support ticket on Github for Solution to Fix Ghost SSL Errors.
Check My Issue Ticket on Github - SSL issue on New Ghost site
Create SSL for another URL (WWW) - Fix Ghost SSL Error
- First Update your Ghost Blog URL to WWW
ghost config url https://www.example.com
- Next Install SSL for WWW
ghost setup nginx ssl
- After Installing SSL for WWW Again Update your Ghost Blog URL
ghost config url https://example.com
- Next, You need to Update WWW Nginx Host File
Here is My Nginx Host Configuration for WWW version URL
/var/www/ghost/system/files/www.example.com.conf
/var/www/ghost/system/files/www.example.com-ssl.conf
Now it redirects WWW to NON-WWW without Errors & SSL Warning.
- Test the Nginx Configuration
sudo nginx -t
- After all, Modifications reload the Nginx server
sudo nginx -s reload
Ghost-CLI Commands
Before using Below Commands open your Ghost CMS Installed Folder.
- Update your Ghost blog into New Version
ghost update
- Remove/Uninstall the Ghost blog
ghost uninstall
- restart the Ghost blog
ghost restart
- Ghost blog Setup
ghost setup
- Start the Ghost
ghost start
- Stop the Ghost
ghost stop
- Install SSL
ghost setup ssl
- check Logs
ghost log
Others
- update the Ghost-CLI tool
sudo npm install -g ghost-cli@latest
- List your Ghost blogs
ghost ls
- Learn More about Ghost-CLI tool Just run this Below Command line
ghost help
- Fix Ghost files with incorrect permissions
sudo chown -R ghost:ghost ./content
- That's all
Ghost CMS Google Cloud Setup
Update: Ghost one-Click Launcher is Now Available in Google Cloud
- OS - Ubuntu (Ubuntu Xenial 16.04 LTS)
- Core - 1 vCPU
- Memory - 1 or 2GB
- Boot Disk type - SSD & Space Min - 5Gb | Max - 10GB is Enough for Ghost
- Firewall - Tick both HTTP and HTTPS Traffic
- Server Location - US Central/East/West (Cost is Low Compared to Asian Server Location)
- Total Estimated Cost - 20.5$ Per month
- SMPT Port for Google Cloud - 2525
- Setup Custom Domain - Goto Networking Services > Cloud DNS > Create Zone & Connect your Domain or Create a New A Record for your Gcloud IP on your Domain's DNS Manager (PS: Delete the other A Record entries)
- Follow the Above Method to Install Ghost on Google Cloud (PS: Ignore Super user creation Step - Just update the Packages and Start with Nginx Installation Step)
From the Editor's Desk
I have Personally tested this Ghost CLI tool on Digitalocean, Google Cloud and Linode.
It's working perfectly and it's very Easy to use & Manage.
This tutorial is also applicable for Vultr/Linode/Google Cloud & VPS with SSH Access Support.
Hope this tutorial will Help you to Install Ghost on Ubuntu
Official Docs From Ghost Team
| Editor's Rating | Install Ghosh via Ghost-CLI |
|---|---|
| Published | 13 July 2017 |
| Summary | Ghost CMS - Install Ghost CMS Via Ghost-CLI with Free SSL and HTTP/2 Support. |
| Reviewer | Santhosh veer |
| Features | CLI Commands, Instant Setup, Nginx, MYSQL, Free SSL and HTTP/2 |
| Ratings | 5/5 - |